> ## Documentation Index
> Fetch the complete documentation index at: https://docs-staging.auth0-mintlify.app/llms.txt
> Use this file to discover all available pages before exploring further.
> Learn how to configure Okta as an OIDC identity provider for Cross App Access (XAA).
# Okta as OIDC IdP
export const ReleaseStageNotice = ({feature, stage, plans, contact, terms}) => {
const stageTextMap = {
"beta": "Beta",
"ea": "Early Access"
};
const stageText = stageTextMap[stage] || "a product release stage";
const prsLink = "/docs/troubleshoot/product-lifecycle/product-release-stages";
const linkify = (text, url) => {
return {text};
};
const includeDetails = (plans, contact, terms) => {
const hasDetails = terms || plans || contact;
if (!hasDetails) return null;
return
{plans && <>This feature is available for {linkify(`${plans} plans`, "https://auth0.com/pricing")}. }
{contact && "To participate, contact " + contact + ". "}
{terms && <>By using this feature, you agree to the applicable Free Trial terms in Okta's {linkify("Master Subscription Agreement", "https://www.okta.com/legal")}.}
;
};
return
The {feature} feature is in {linkify(stageText, prsLink)}.
{includeDetails(plans, contact, terms)}
;
};
This guide assumes you use Okta as your enterprise identity provider (IdP) and have administrative access to an Okta tenant you can use for testing. If you don’t have one, read [Create and configure your Okta tenant](/docs/secure/call-apis-on-users-behalf/xaa/idp/okta-as-oidc-idp#create-and-configure-your-okta-tenant).
This page walks through configuring Okta as the OIDC enterprise identity provider for Cross App Access (XAA). You'll set up an Okta tenant, register the Resource and Requesting Apps in Okta, and configure a Workforce Enterprise connection so Auth0 can federate with Okta.
## Create and configure your Okta tenant
To set up your end-to-end test environment for the Resource App, you need to create and configure your Okta tenant for Cross App Access.
* On the [Okta Developer website](https://developer.okta.com/signup/), sign up for an Okta Integrator Free Plan. Once you sign up, you should be redirected to your new Okta tenant.
* To enable Cross App Access, email `developers@okta.com` to request XAA enablement for your Okta tenant. Once approved, the Okta team can provide links to any available XAA Requesting and Resource Apps.
## Register the Requesting App in Okta
### Create Requesting App in Okta
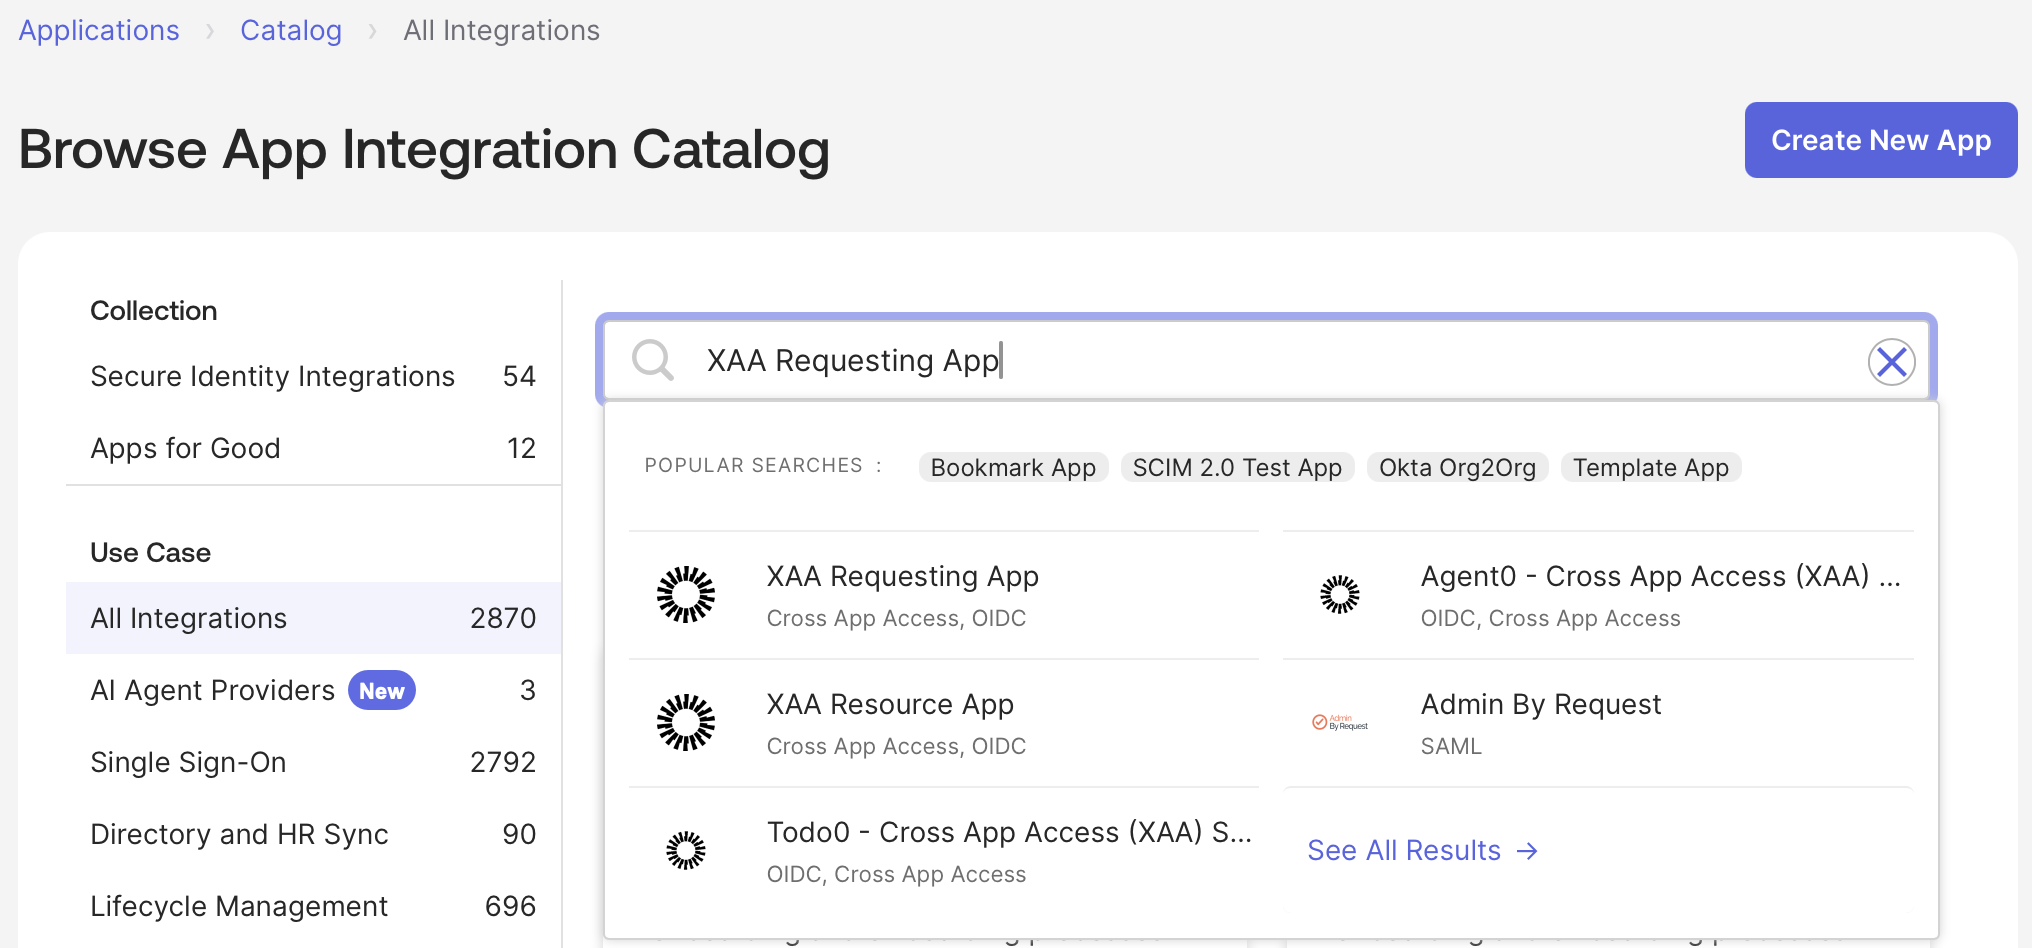
In a production environment, the Requesting App developer registers the Requesting App in the Okta Integration Network (OIN). Enterprise customers will install the Requesting App from the OIN catalog during their IdP setup.
You must register the application in the Okta Integration Network (OIN) for it to be considered a valid XAA Requesting App when using Okta as the enterprise IdP.
* To register the Requesting App in Okta, read the [Submission process for SSO and SCIM integrations](https://developer.okta.com/docs/guides/submit-app-overview/#submission-process-for-sso-and-scim-integrations). To accelerate the registration process, contact your Auth0 or Okta representative.
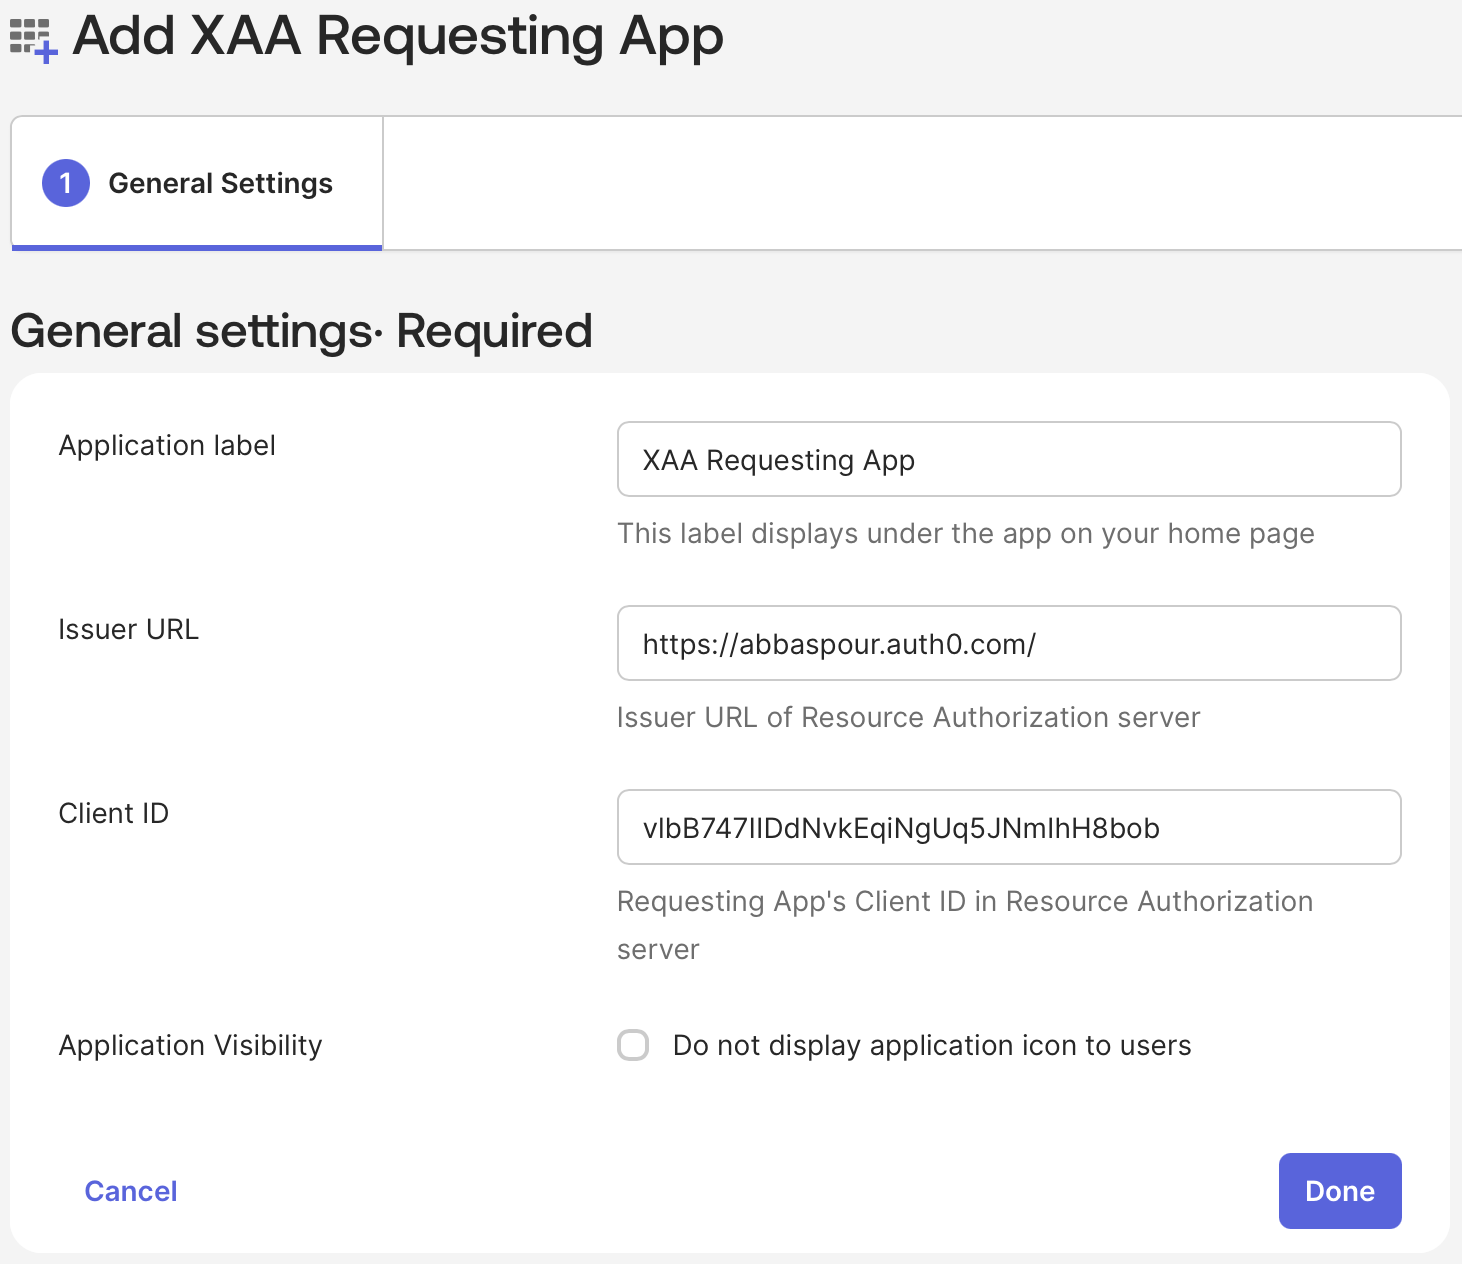
 * During XAA Requesting App install, configure **Issuer URL** to point to your Auth0 tenant and **Client ID** to point to your **Agent0** application in Auth0.
 * You can also request the registration of a new application in the OIN. To learn more, read the [Submission process for SSO and SCIM integrations](https://developer.okta.com/docs/guides/submit-app-overview/#submission-process-for-sso-scim-provisioning-and-api-service-integrations). To accelerate the registration process, contact your Auth0 or Okta representative.
Since the Requesting App authenticates enterprise employees with Okta, you need to configure the application’s [sign-on policy](https://help.okta.com/en-us/content/topics/security/policies/policies-home.htm) in Okta.
1. Go to **Applications > Applications** and select the application (e.g. Agent0).
2. Under **Sign On**, select **Edit** and add the Requesting App’s callback URL in the **Redirect URI** field. Adjust the Redirect URI’s value depending on the testing application you want to use. To learn more, read [Test the end-to-end XAA flow](/docs/secure/call-apis-on-users-behalf/xaa/end-to-end-testing).
3. Select **Save**.
* You can also request the registration of a new application in the OIN. To learn more, read the [Submission process for SSO and SCIM integrations](https://developer.okta.com/docs/guides/submit-app-overview/#submission-process-for-sso-scim-provisioning-and-api-service-integrations). To accelerate the registration process, contact your Auth0 or Okta representative.
Since the Requesting App authenticates enterprise employees with Okta, you need to configure the application’s [sign-on policy](https://help.okta.com/en-us/content/topics/security/policies/policies-home.htm) in Okta.
1. Go to **Applications > Applications** and select the application (e.g. Agent0).
2. Under **Sign On**, select **Edit** and add the Requesting App’s callback URL in the **Redirect URI** field. Adjust the Redirect URI’s value depending on the testing application you want to use. To learn more, read [Test the end-to-end XAA flow](/docs/secure/call-apis-on-users-behalf/xaa/end-to-end-testing).
3. Select **Save**.
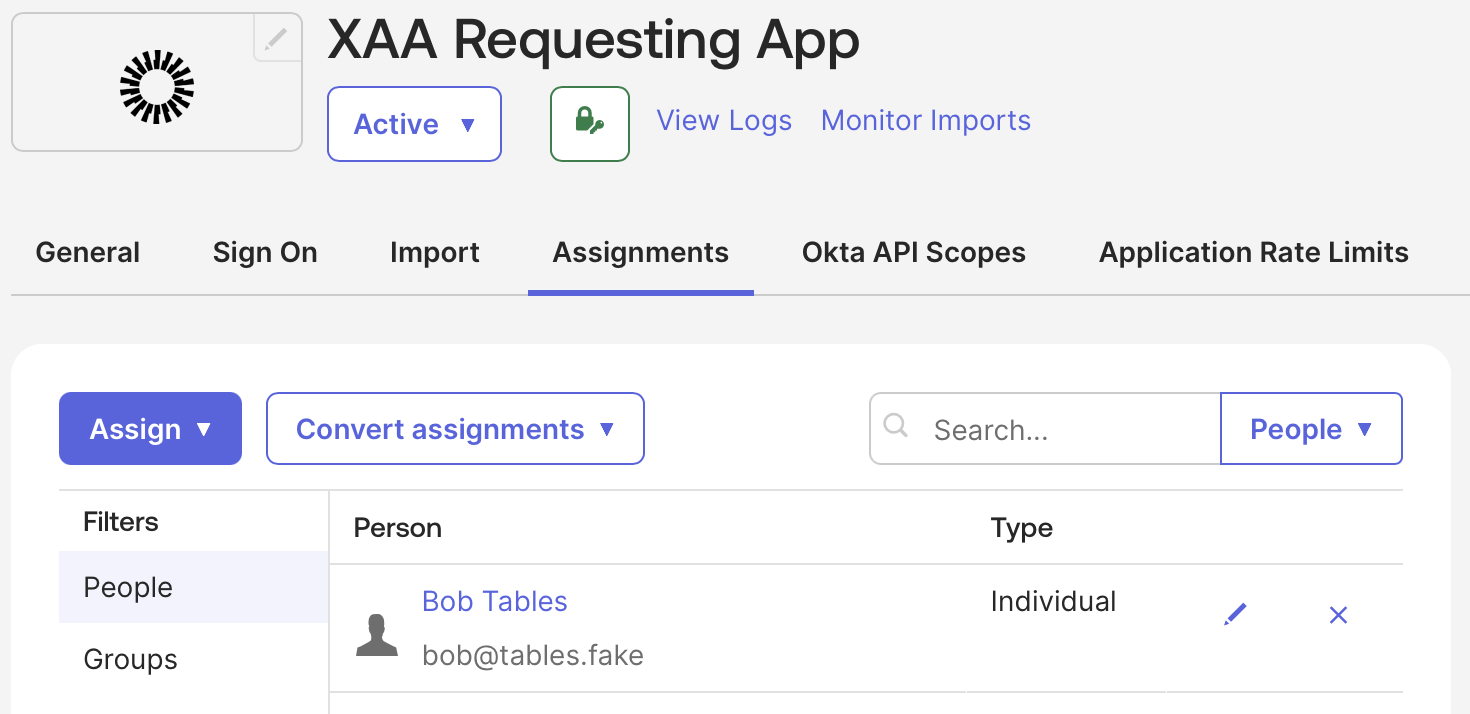
 ### Assign Requesting Application to Test Users
Finally, allow your test user to log into the Requesting App in Okta.
In the Okta Admin Console:
1. Navigate to **Applications** and select the requesting application you created.
2. Select **Assign > Assign to People** and select your test user.
3. Select **Save**.
### Assign Requesting Application to Test Users
Finally, allow your test user to log into the Requesting App in Okta.
In the Okta Admin Console:
1. Navigate to **Applications** and select the requesting application you created.
2. Select **Assign > Assign to People** and select your test user.
3. Select **Save**.
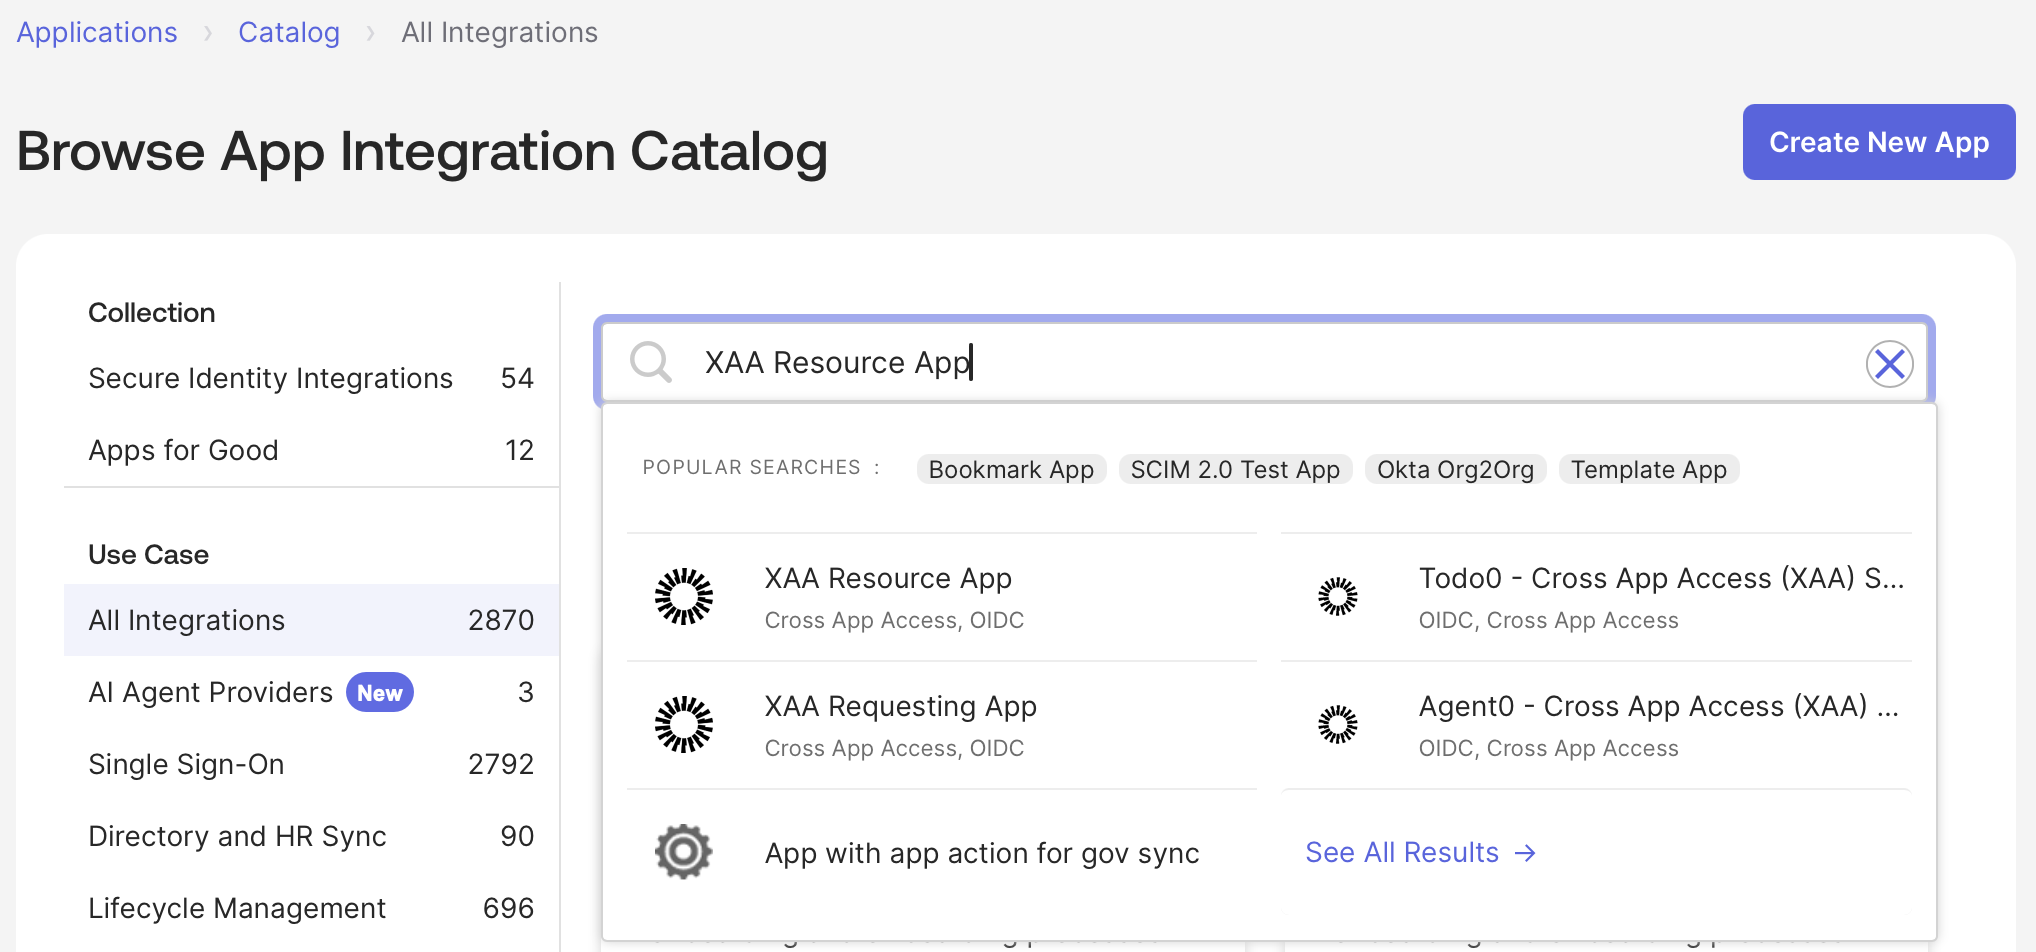
 ## Register the Resource App in Okta
### Create Resource App in Okta
You must register your SaaS application in the Okta Integration Network (OIN) for it to be considered a valid Resource App.
* To register your SaaS application as a Resource App in Okta, read the [Submission process for SSO and SCIM integrations](https://developer.okta.com/docs/guides/submit-app-overview/#submission-process-for-sso-and-scim-integrations). To accelerate the registration process, contact your Auth0 or Okta representative.
## Register the Resource App in Okta
### Create Resource App in Okta
You must register your SaaS application in the Okta Integration Network (OIN) for it to be considered a valid Resource App.
* To register your SaaS application as a Resource App in Okta, read the [Submission process for SSO and SCIM integrations](https://developer.okta.com/docs/guides/submit-app-overview/#submission-process-for-sso-and-scim-integrations). To accelerate the registration process, contact your Auth0 or Okta representative.
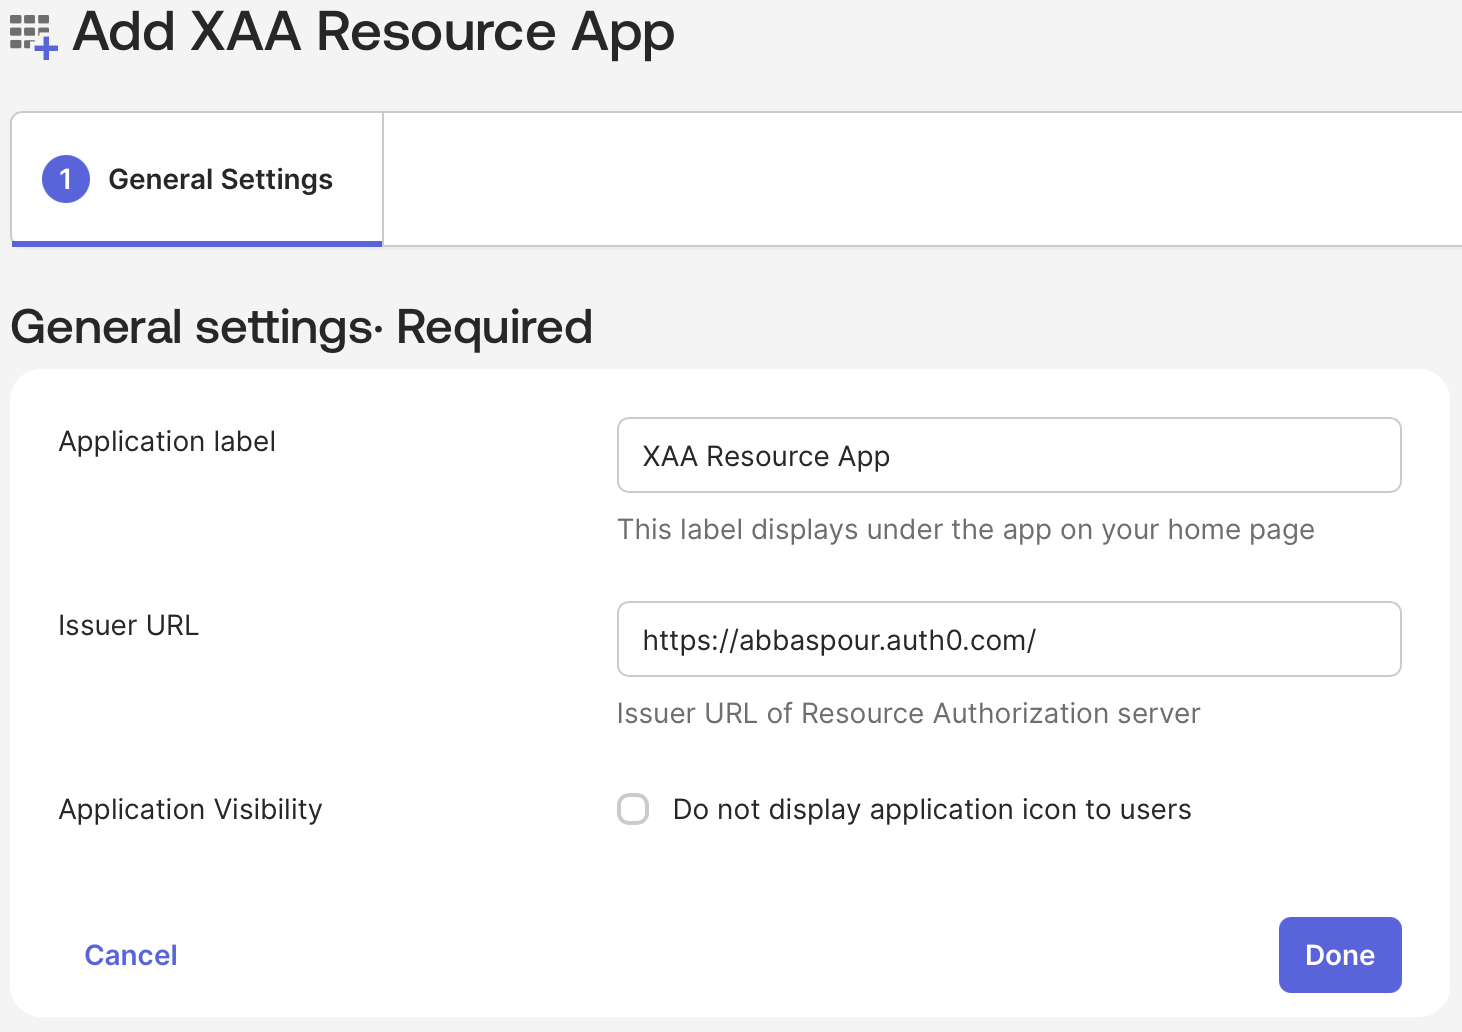
 * During XAA Resource App install, configure **Issuer URL** to point to your Auth0 tenant.
 * You can also request the registration of a new application in the OIN from your Okta tenant. To learn more, read the [Submission process for SSO and SCIM integrations](https://developer.okta.com/docs/guides/submit-app-overview/#submission-process-for-sso-and-scim-integrations). To accelerate the registration process, contact your Auth0 or Okta representative.
In a production environment, your enterprise customers will install your SaaS application from the OIN catalog during their IdP setup.
* Since the Resource App authenticates enterprise employees with Okta, you need to configure the application’s sign-on policy in Okta.
1. Go to Applications > Applications and select the application.
2. Under Sign On, select Edit and add your **Auth0 Tenant’s callback URL** in the **Redirect URI** field.
3. Select Save.
* You can also request the registration of a new application in the OIN from your Okta tenant. To learn more, read the [Submission process for SSO and SCIM integrations](https://developer.okta.com/docs/guides/submit-app-overview/#submission-process-for-sso-and-scim-integrations). To accelerate the registration process, contact your Auth0 or Okta representative.
In a production environment, your enterprise customers will install your SaaS application from the OIN catalog during their IdP setup.
* Since the Resource App authenticates enterprise employees with Okta, you need to configure the application’s sign-on policy in Okta.
1. Go to Applications > Applications and select the application.
2. Under Sign On, select Edit and add your **Auth0 Tenant’s callback URL** in the **Redirect URI** field.
3. Select Save.
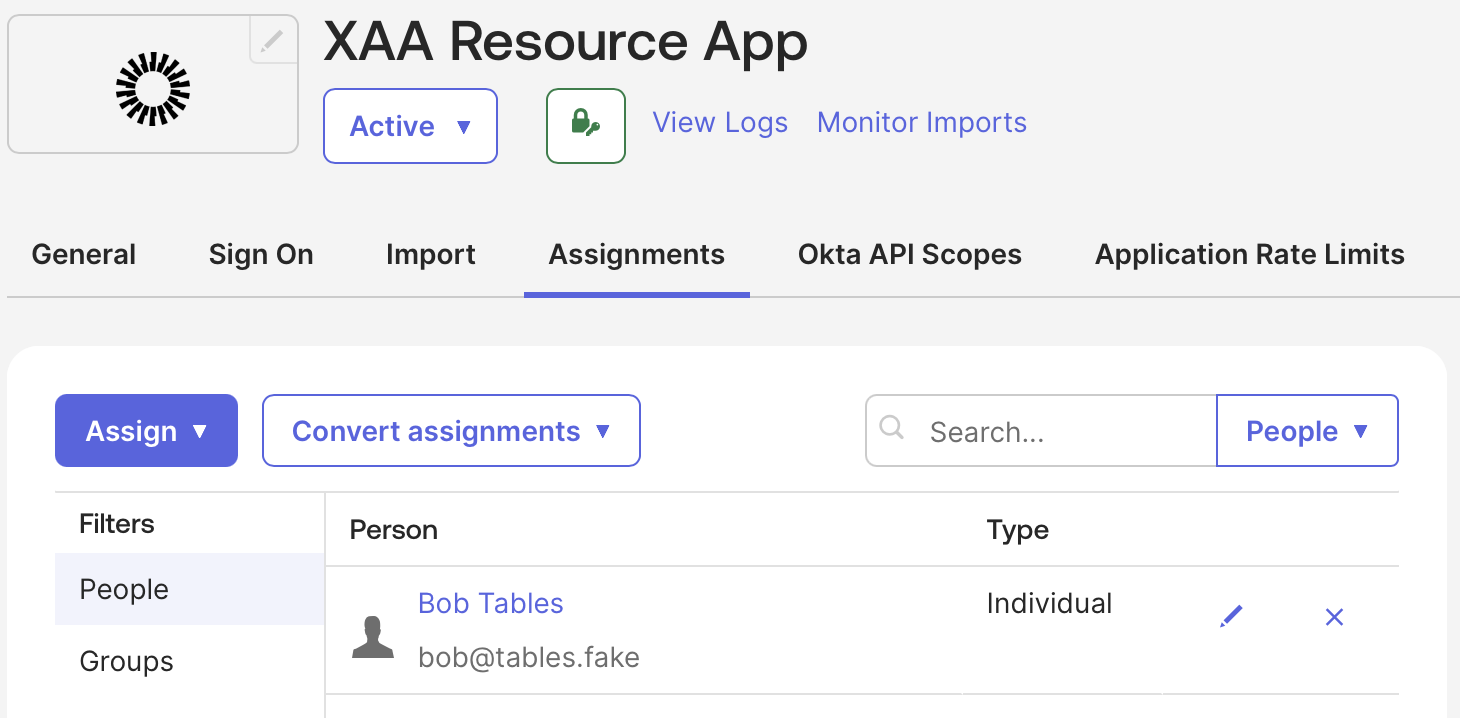
 ### Assign Resource Application to Test Users
Finally, allow your test user to log into the Requesting App in Okta.
In the Okta Admin Console:
1. Navigate to **Applications** and select the resource application you created.
2. Select **Assign > Assign to People** and select your test user.
3. Select **Save**.
### Assign Resource Application to Test Users
Finally, allow your test user to log into the Requesting App in Okta.
In the Okta Admin Console:
1. Navigate to **Applications** and select the resource application you created.
2. Select **Assign > Assign to People** and select your test user.
3. Select **Save**.
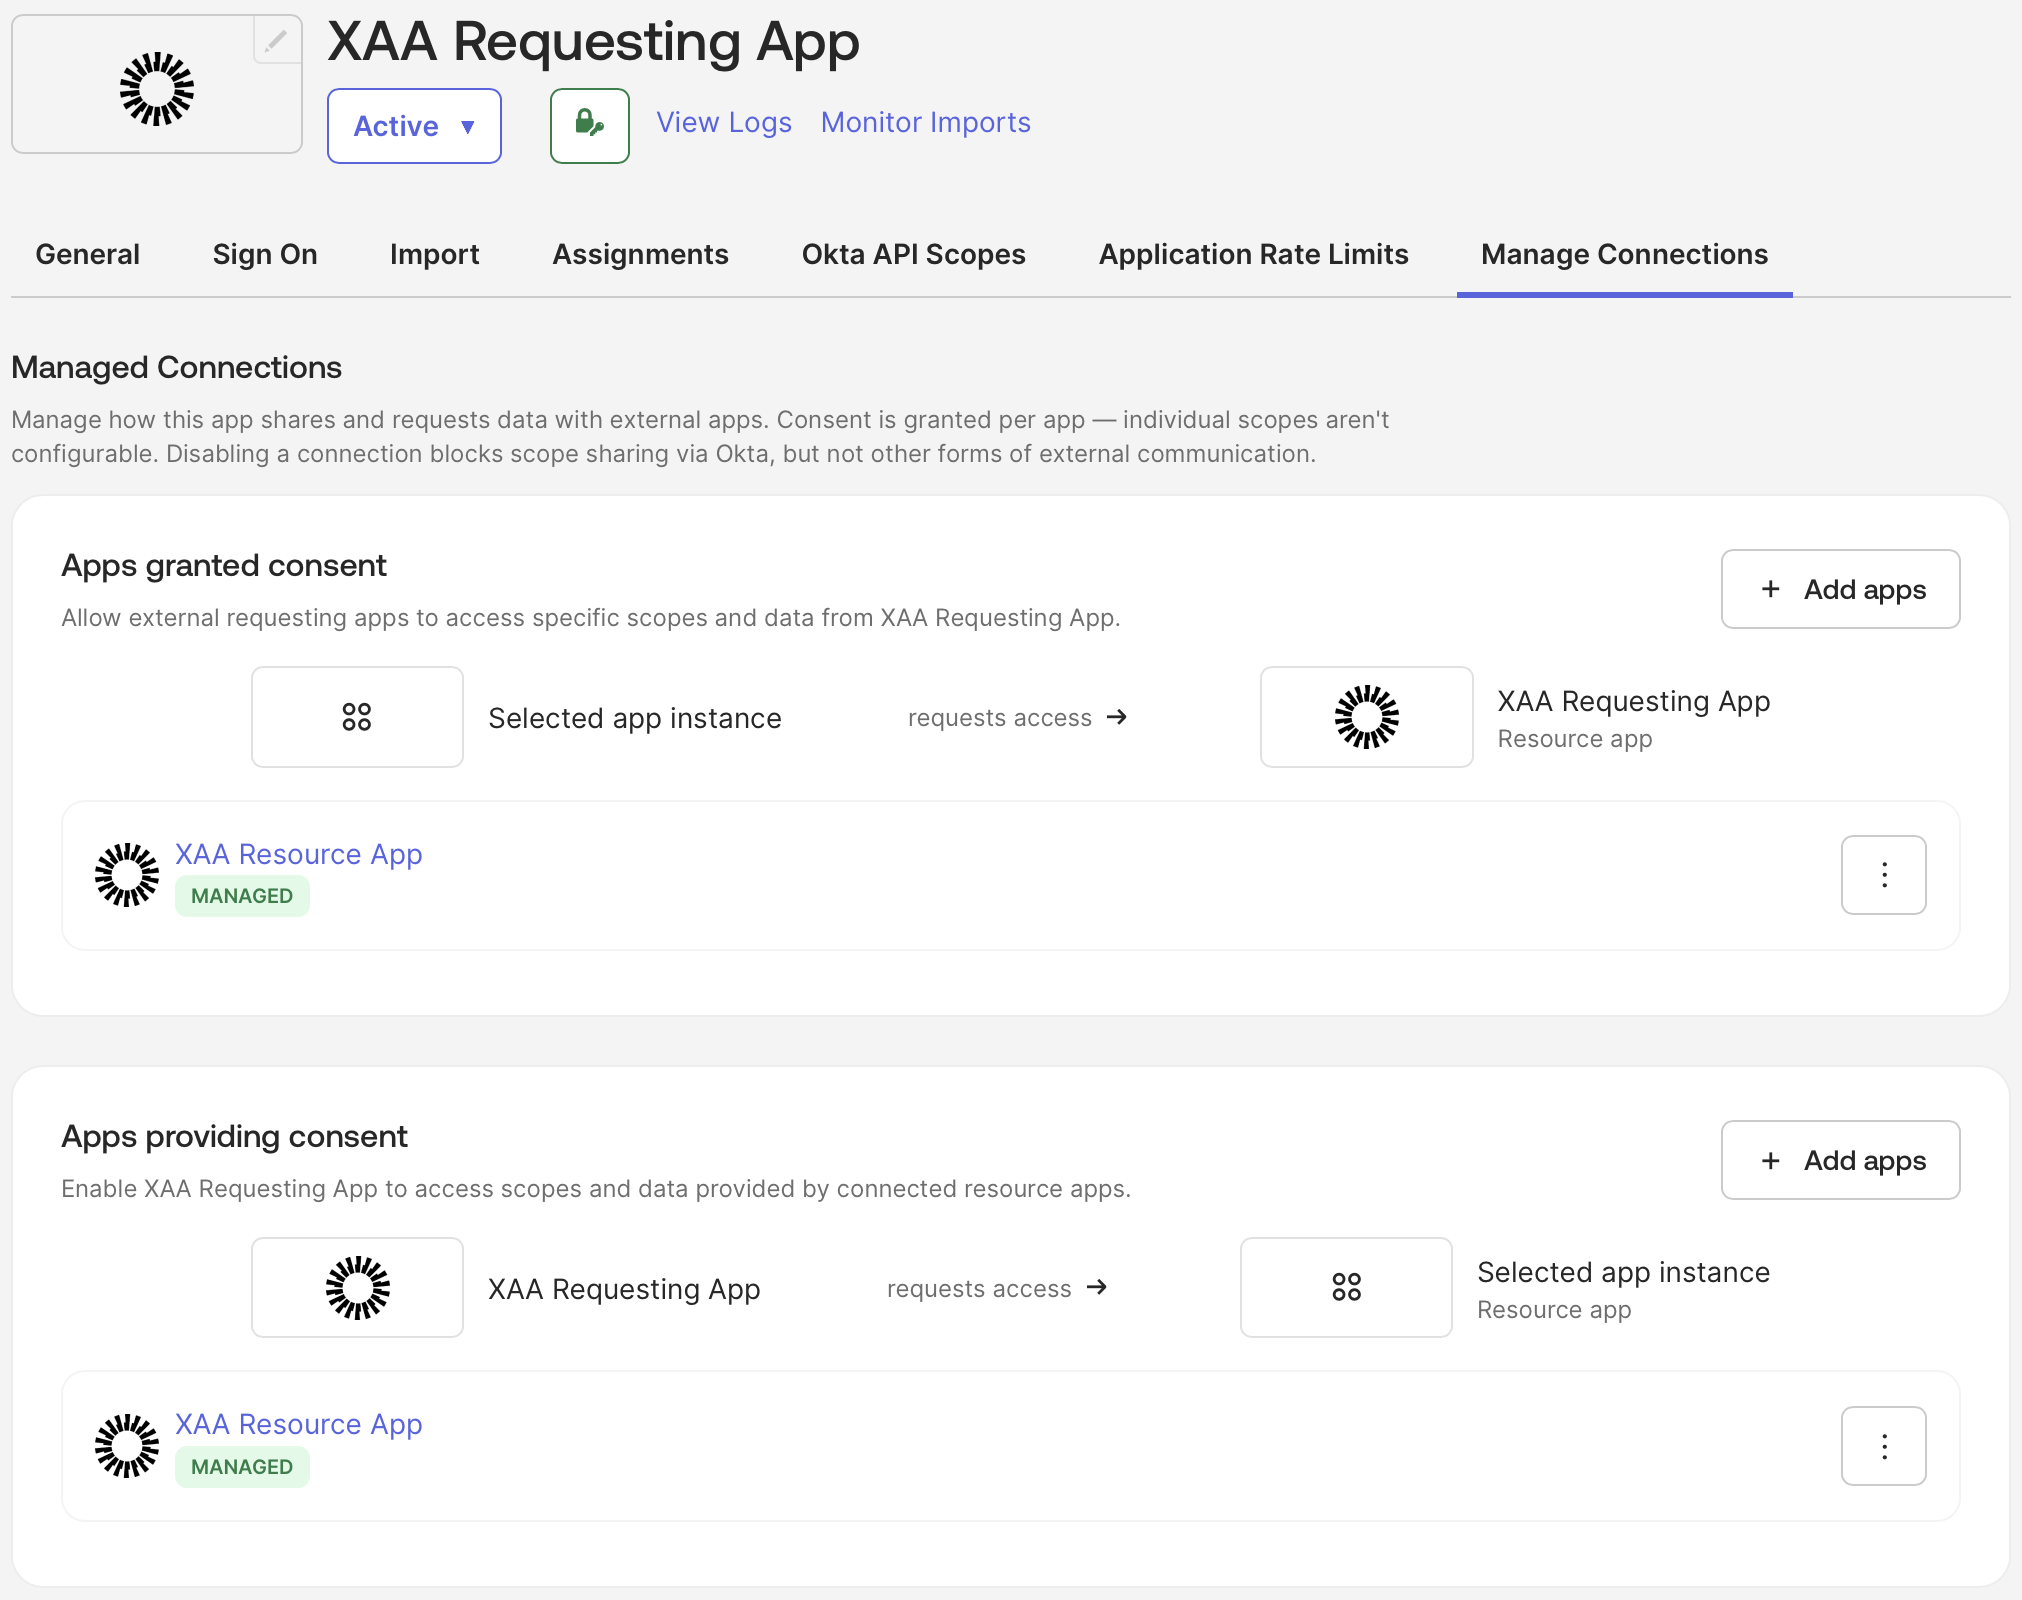
 ### Establishing connections between Requesting and Resource App
1. From the Applications page, select the XAA Requesting app
2. Go to the Manage Connections tab
3. Under App granted consent, select Add requesting apps, select XAA Resource App, then Save
4. Under Apps providing consent, select Add resource apps, select XAA Resource App, then Save
### Establishing connections between Requesting and Resource App
1. From the Applications page, select the XAA Requesting app
2. Go to the Manage Connections tab
3. Under App granted consent, select Add requesting apps, select XAA Resource App, then Save
4. Under Apps providing consent, select Add resource apps, select XAA Resource App, then Save
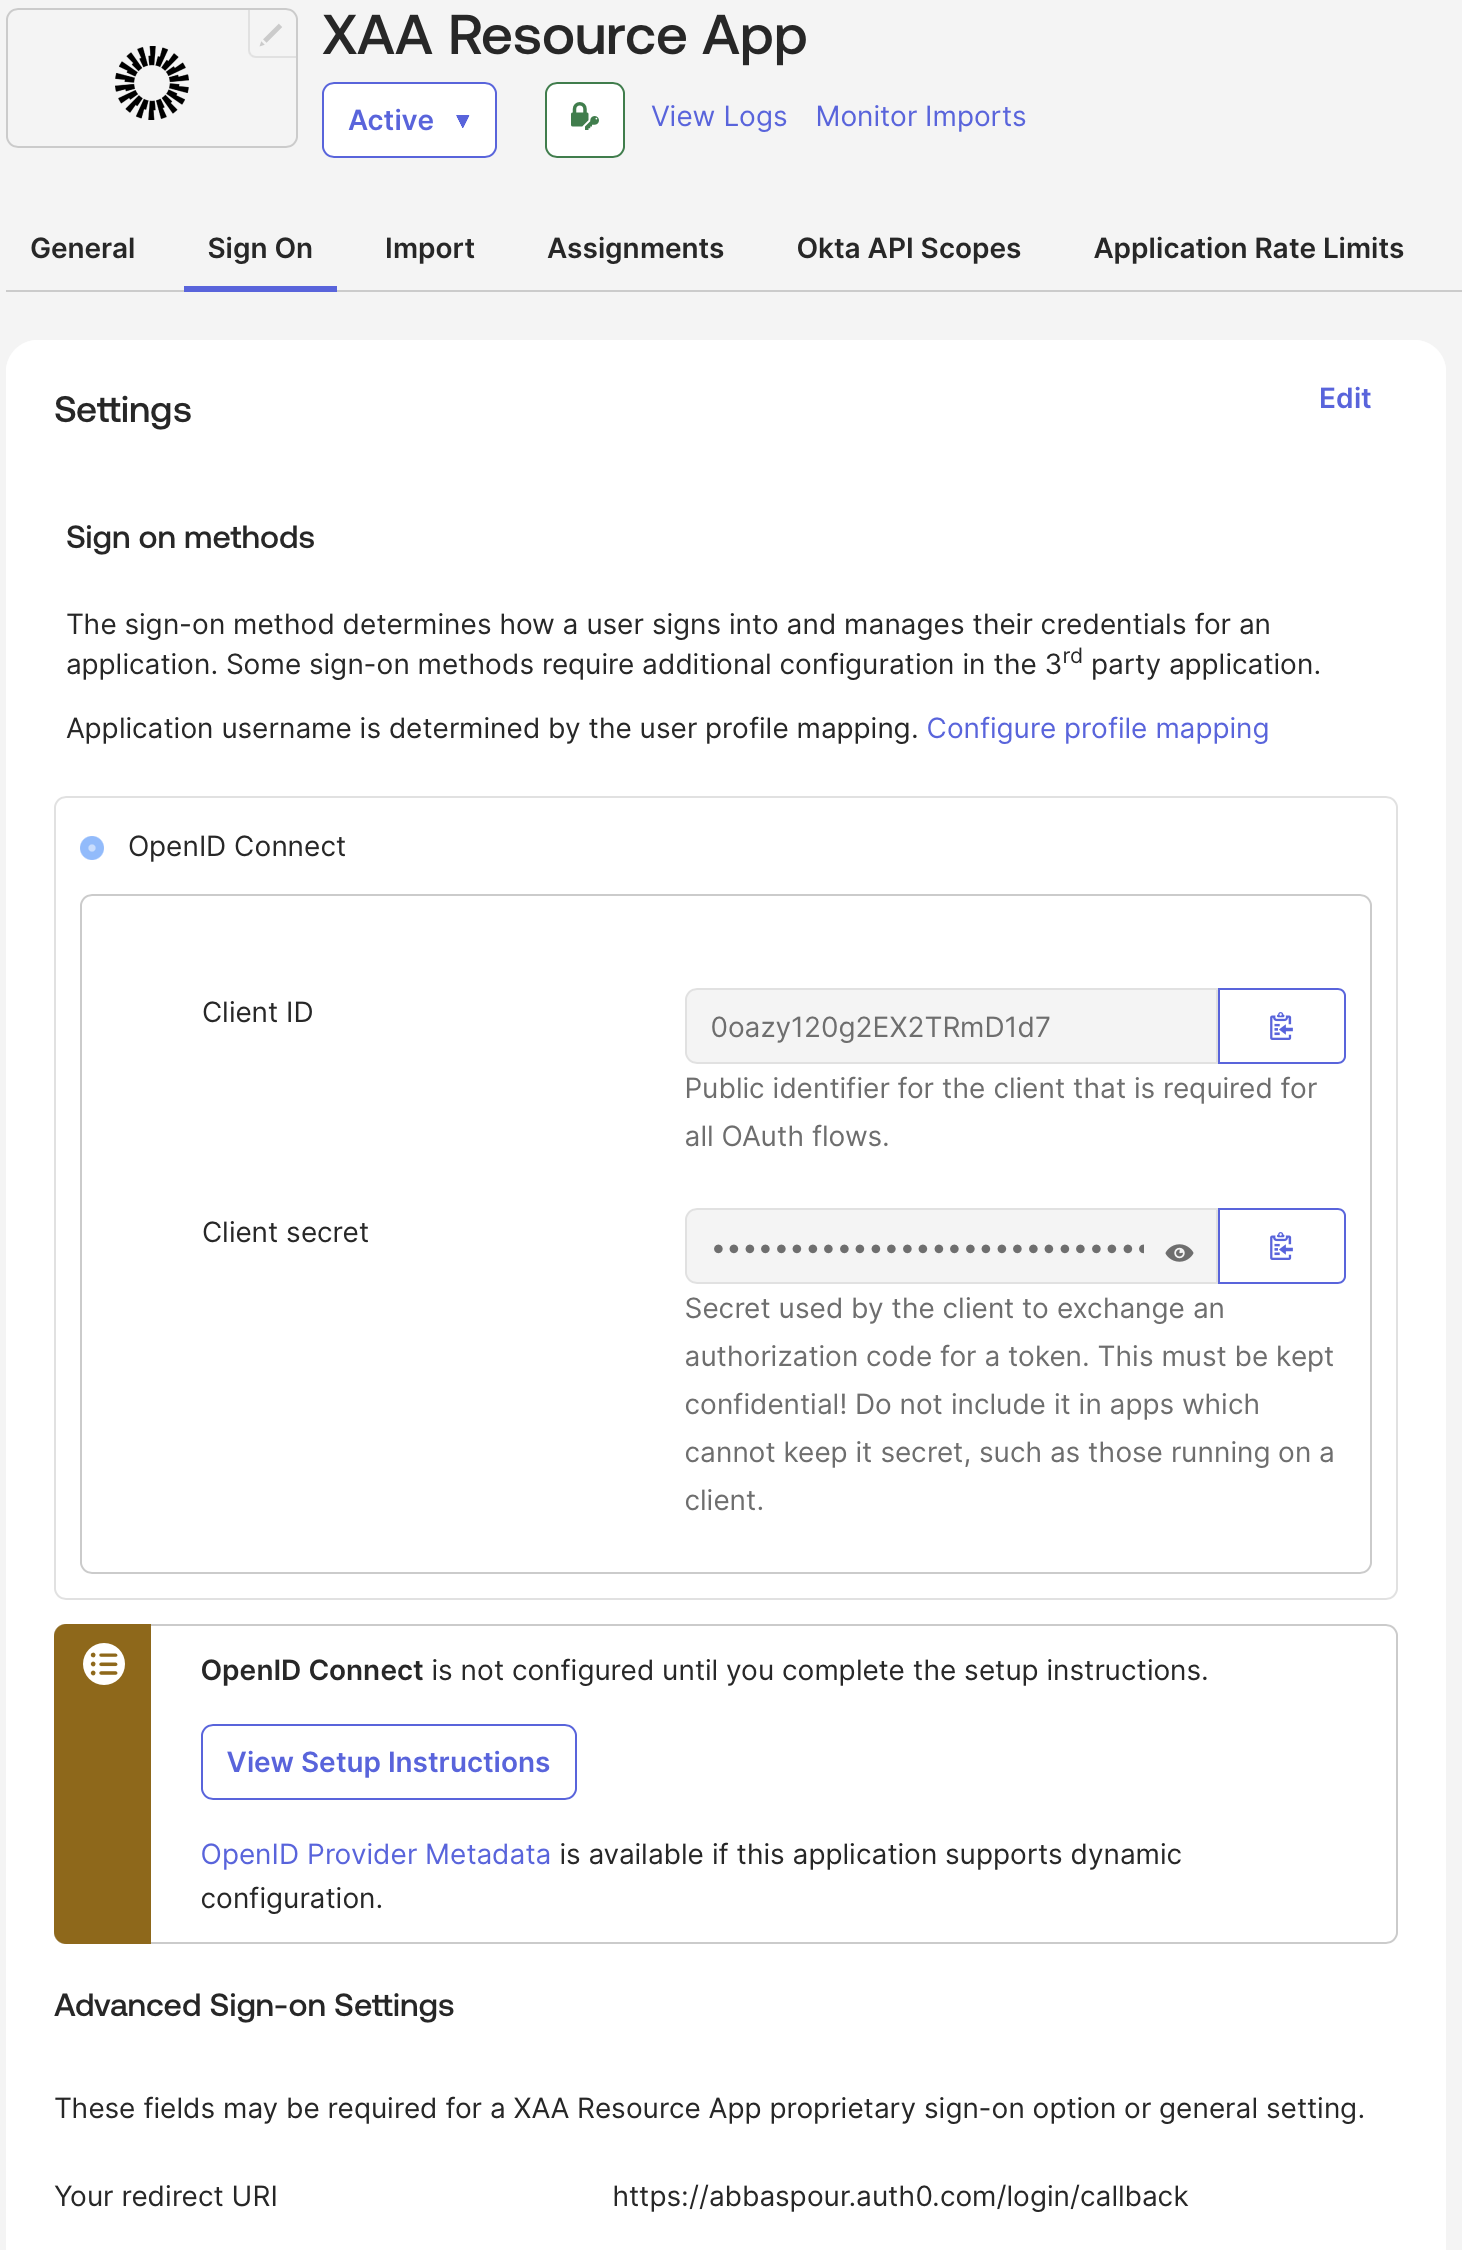
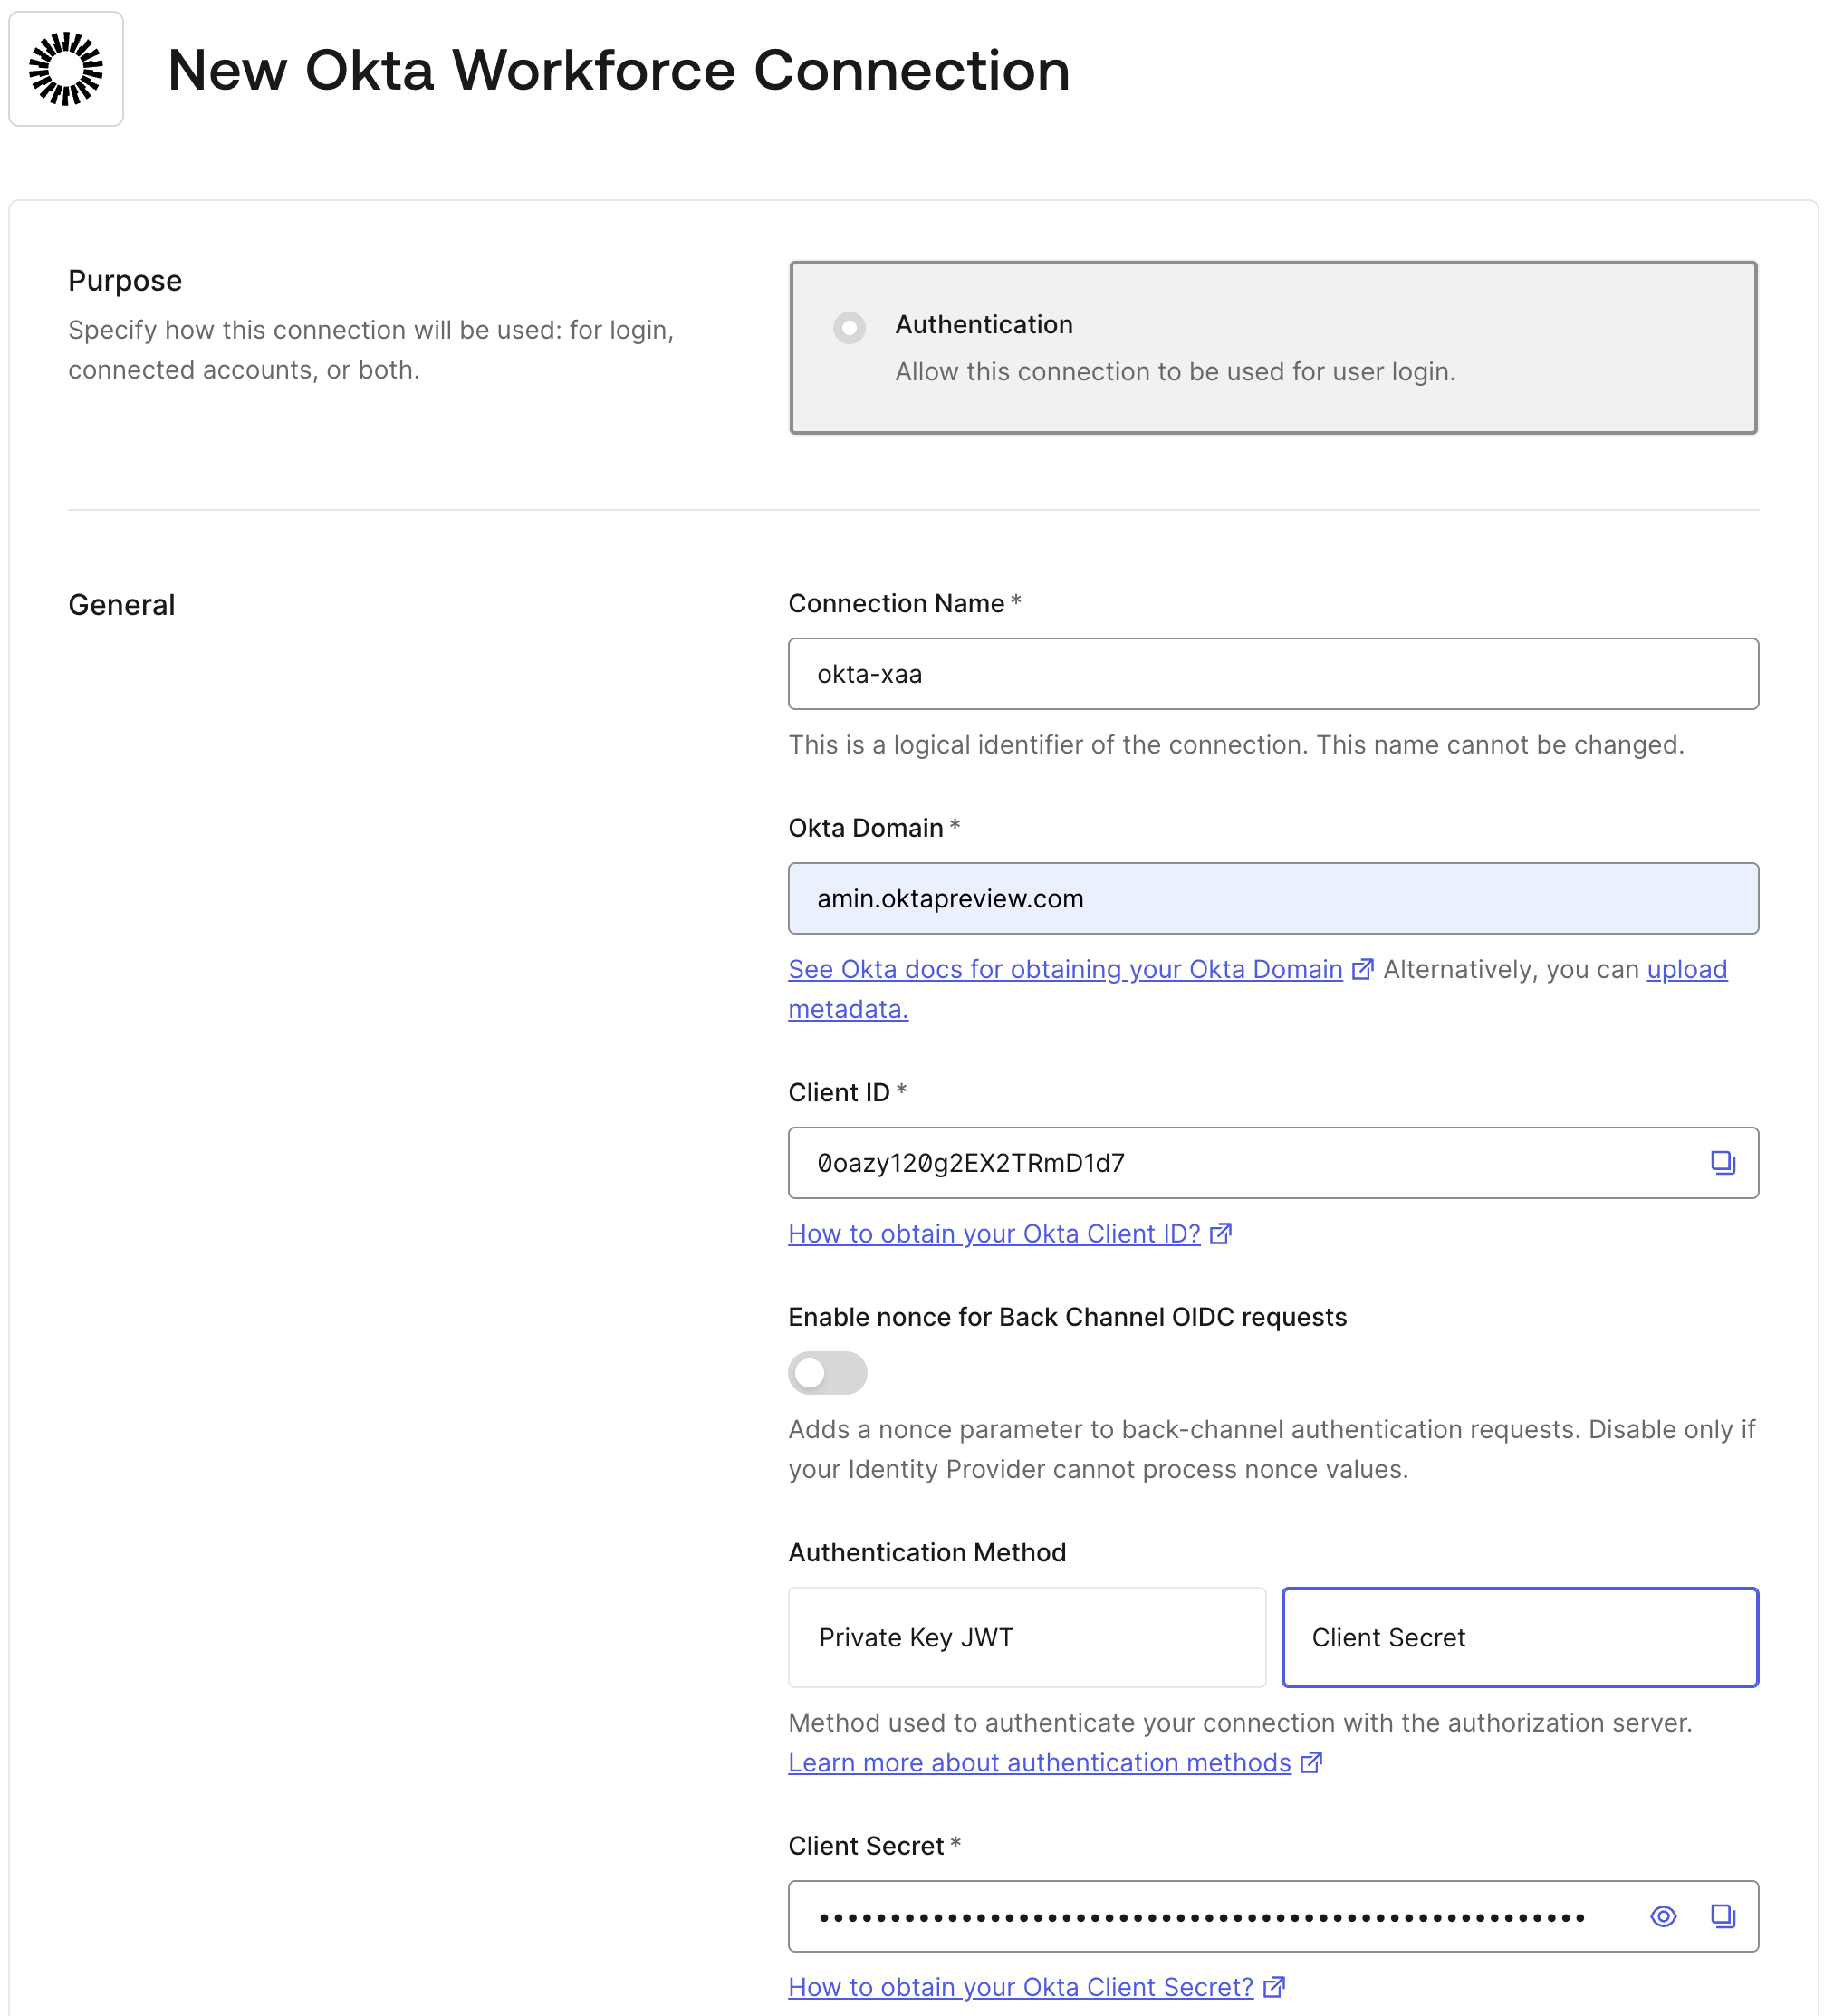
 ### Configure an Okta Workforce Enterprise connection in Auth0
Use your **Resource App**’s `client_id` and `client_secret` to [create an Okta Workforce Enterprise connection](/docs/authenticate/identity-providers/enterprise-identity-providers/okta) in your Auth0 tenant.
### Configure an Okta Workforce Enterprise connection in Auth0
Use your **Resource App**’s `client_id` and `client_secret` to [create an Okta Workforce Enterprise connection](/docs/authenticate/identity-providers/enterprise-identity-providers/okta) in your Auth0 tenant.
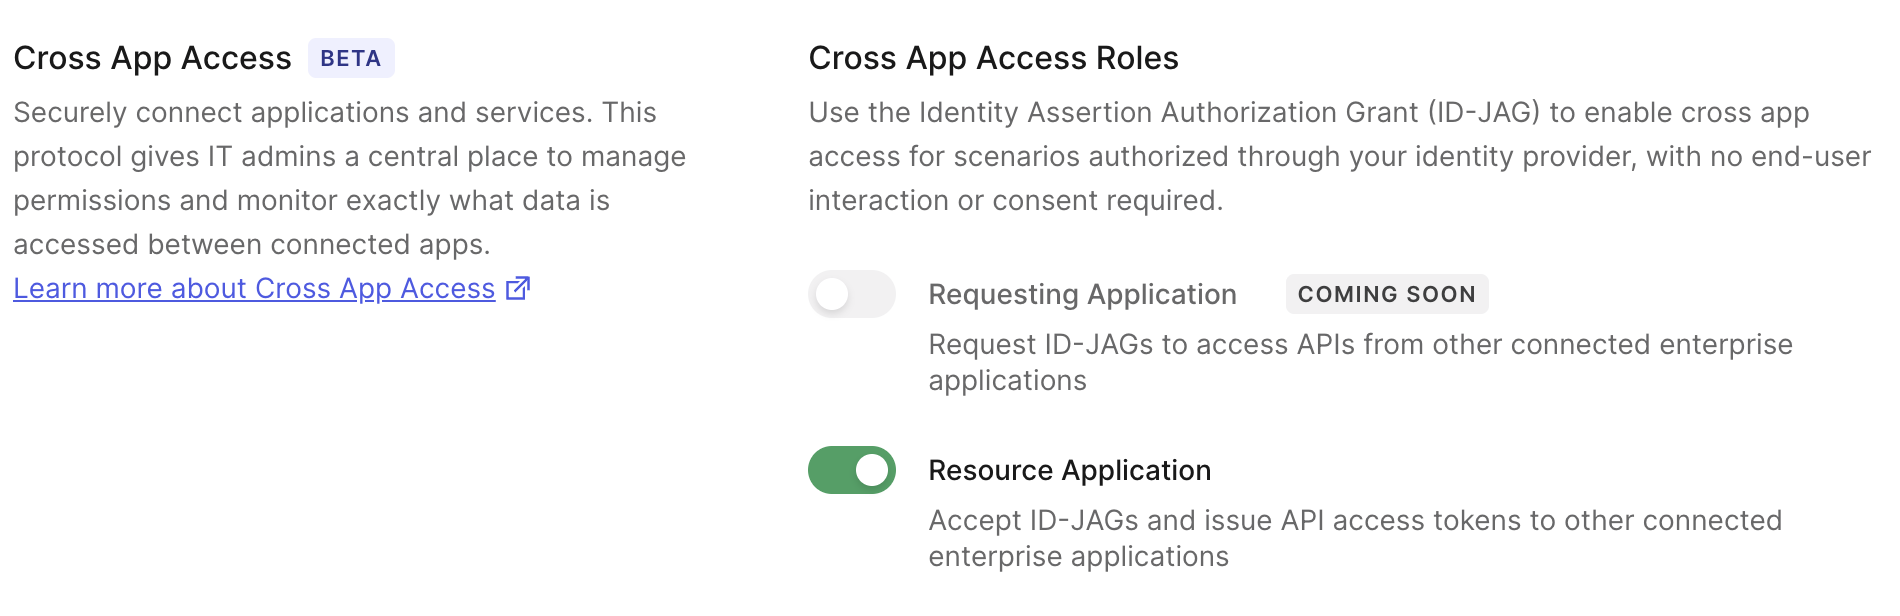
 When creating the Okta Workforce Enterprise connection, activate the **Cross App Access - Resource Application** role. This enables your Resource App to accept ID-JAGs issued by the enterprise IdP associated with that connection, in this case, your Okta tenant.
 After creating the Okta Workforce Enterprise connection, check that the **Callback URL provided by Auth0** in the connection's settings, matches the **Redirect URI** configure the sign-on policies of the **Resource App in your Okta** tenant.
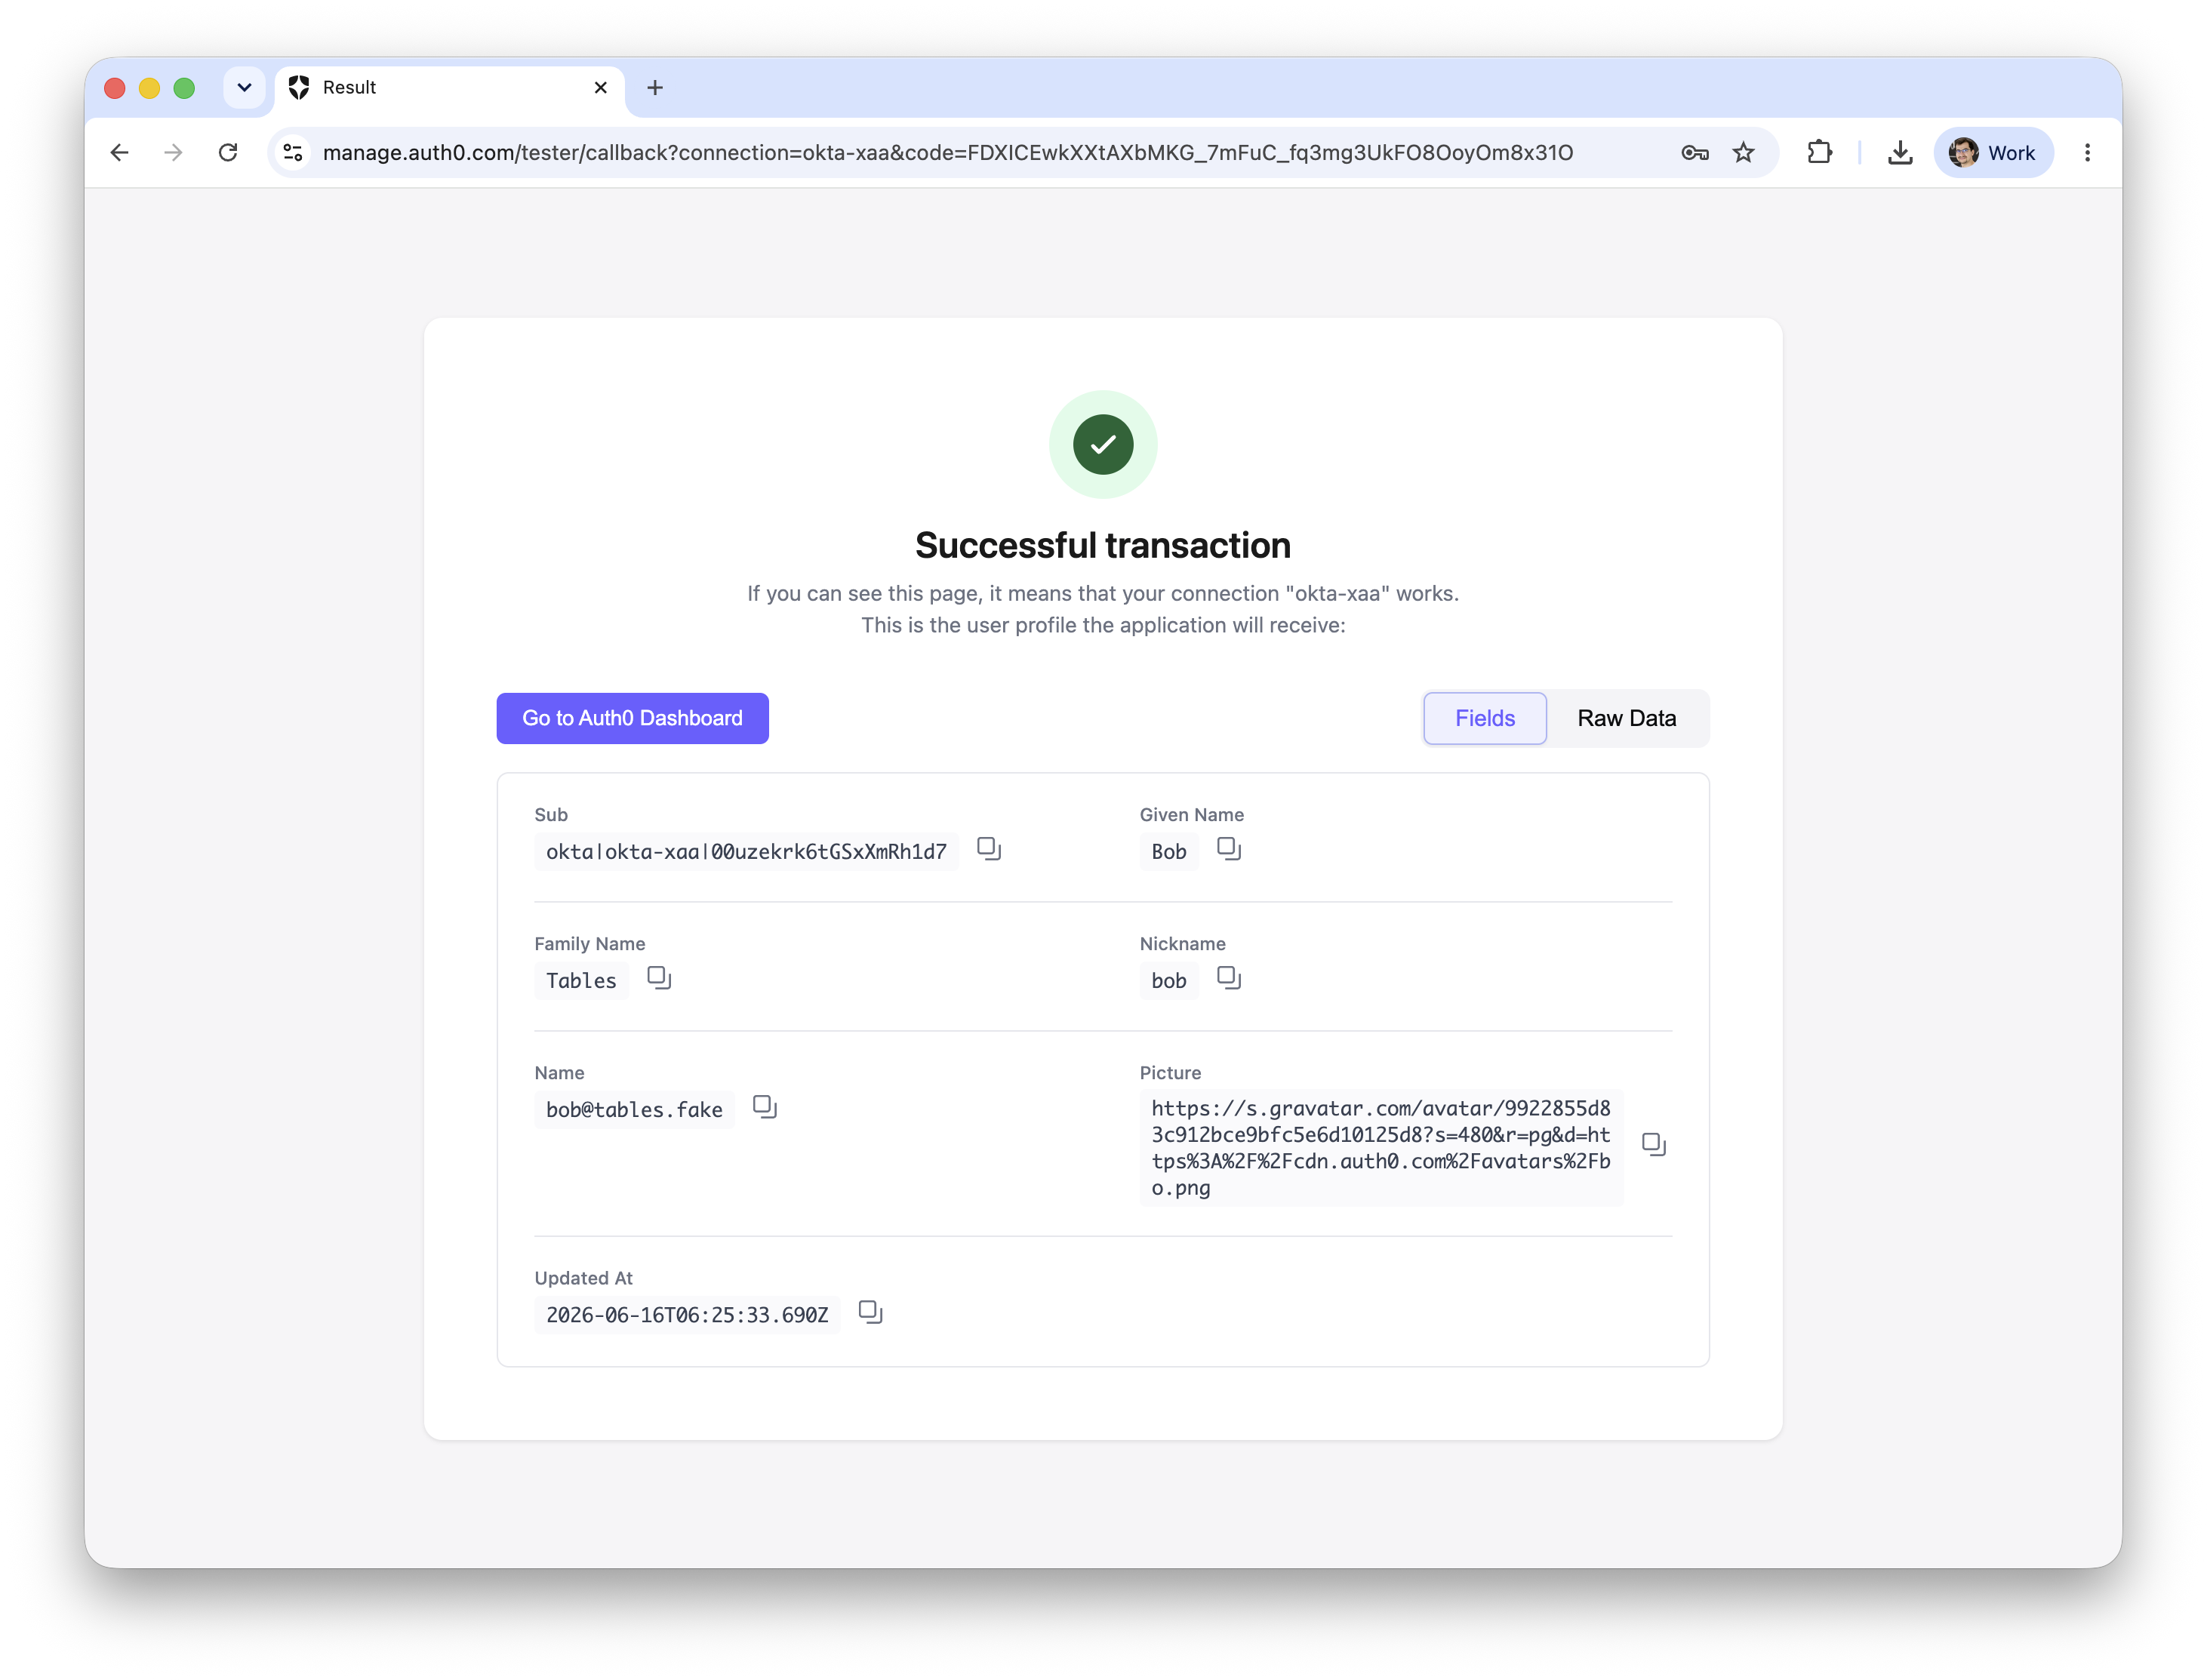
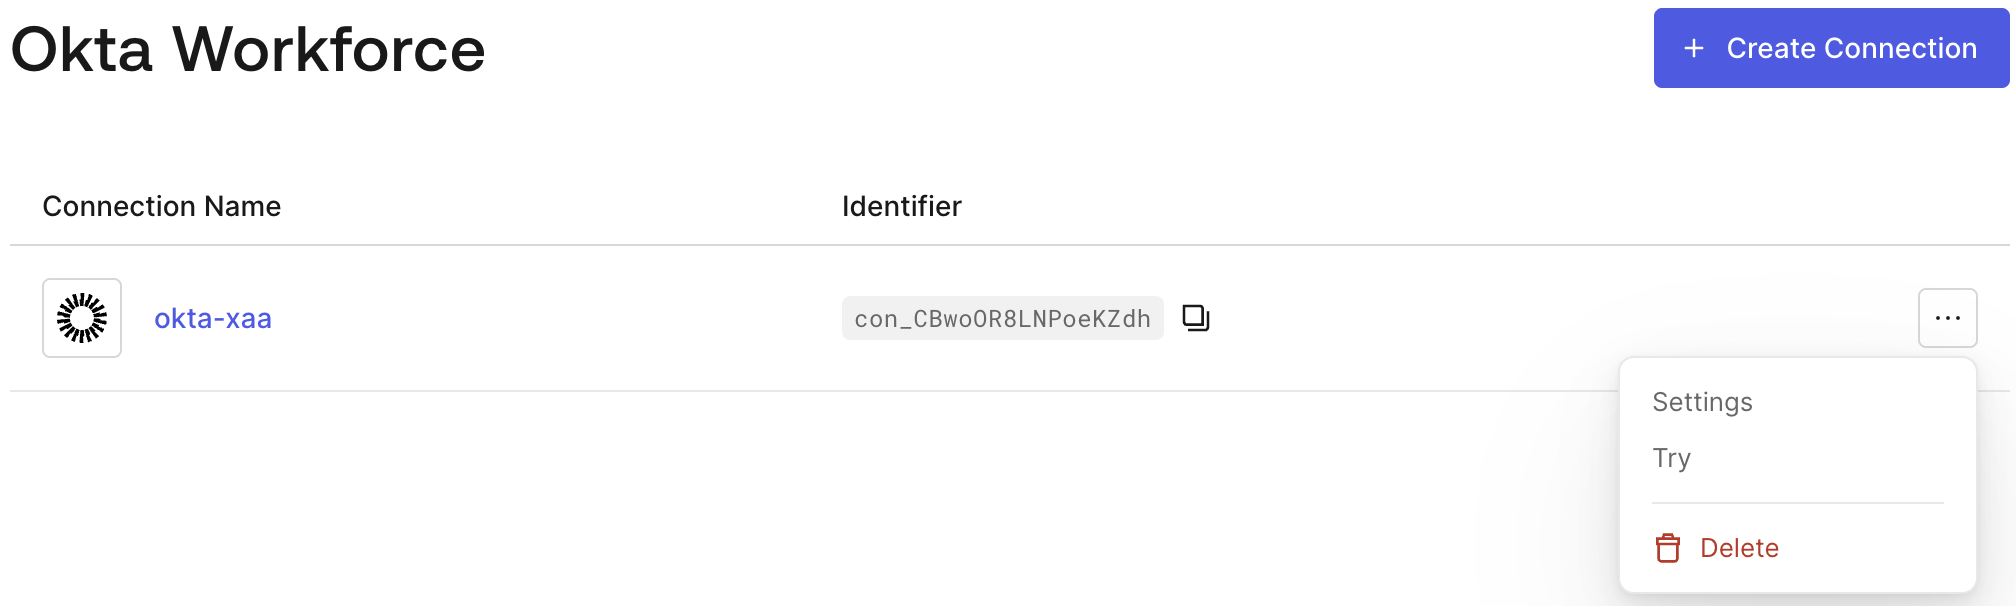
### Testing Connection in Auth0
In the Auth0 Dashboard:
* Navigate to **Authentication > Enterprise > Okta Workforce**:
* Enter the Okta Workforce Enterprise connection you created and select the **Applications** tab. Then, enable the Requesting App you created for the connection.
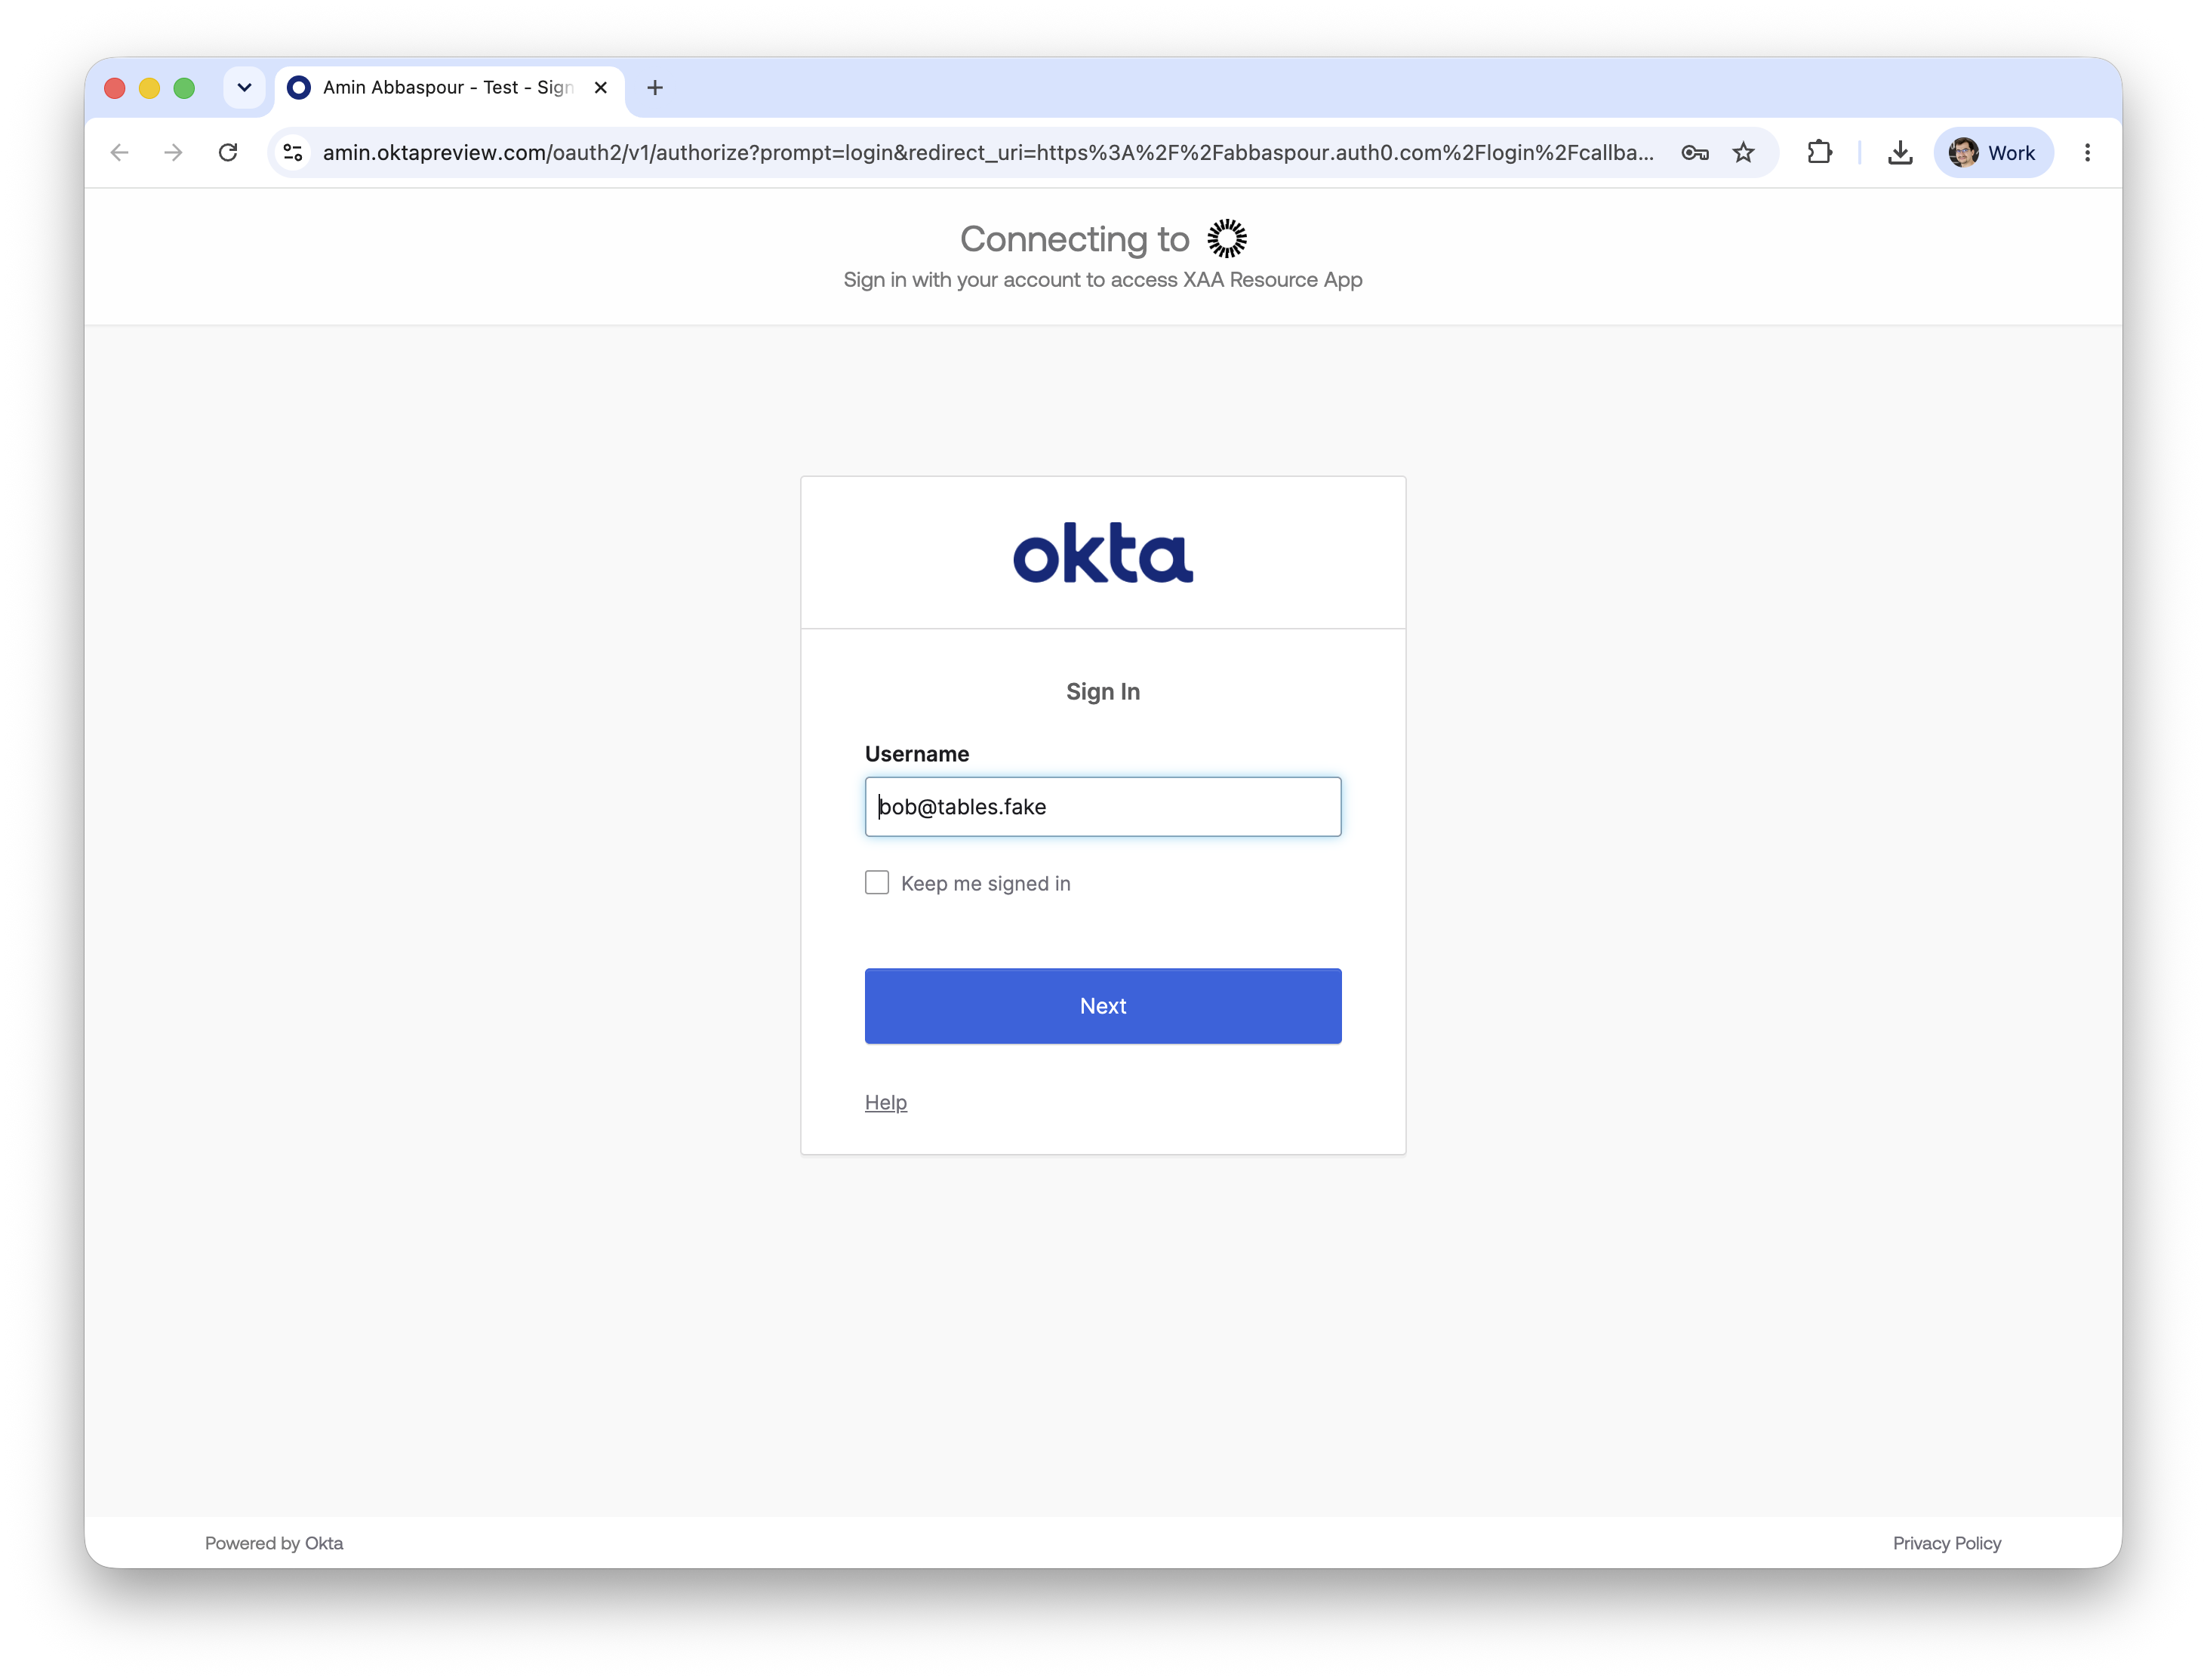
* Go back to the list of Okta Workforce connections. Select the three dots on the right for your connection and select **Try**. You will be redirected to authenticate in your Okta tenant to complete the login with your test user.
After creating the Okta Workforce Enterprise connection, check that the **Callback URL provided by Auth0** in the connection's settings, matches the **Redirect URI** configure the sign-on policies of the **Resource App in your Okta** tenant.
### Testing Connection in Auth0
In the Auth0 Dashboard:
* Navigate to **Authentication > Enterprise > Okta Workforce**:
* Enter the Okta Workforce Enterprise connection you created and select the **Applications** tab. Then, enable the Requesting App you created for the connection.
* Go back to the list of Okta Workforce connections. Select the three dots on the right for your connection and select **Try**. You will be redirected to authenticate in your Okta tenant to complete the login with your test user.
 * Login with the user you assigned to XAA Resource Applications
 * Verify login was successful